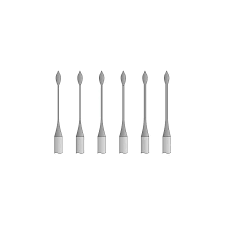
In the fundamental stages of root canal preparation, the Gates Glidden drill remains a classic and indispensable tool for achieving straight-line access to the canal system. Specifically designed for the coronal third of the root canal, Gates Glidden drills are used to enlarge the orifice and remove lingual shoulders, facilitating the easier insertion of subsequent rotary or manual files. At MedSTA, we recognize that a clear, unobstructed path is essential for thorough irrigation and successful obturation. As a staple in our professional Endodontic Supplies collection, our Gates Glidden drills are engineered from premium stainless steel to provide the rigidity and cutting power needed for efficient coronal flaring. By utilizing high-quality Gates Glidden drills, practitioners in the Egyptian dental market can significantly improve their tactile control during the deeper instrumentation phases.
How to Choose the Right Gates Glidden for Your Practice
ISO Standardized Sizing (1–6): Choose Gates Glidden drills based on the standardized numbering system where sizes 1 to 6 correspond to specific diameters (0.50mm to 1.50mm). Having a full set allows the clinician to gradually and safely enlarge the canal orifice according to the tooth’s specific anatomy.
Stainless Steel Material Grade: Prioritize Gates Glidden drills manufactured from high-grade surgical stainless steel. This material ensures the drill maintains its cutting edge through multiple uses and resists the corrosive environment of high-temperature autoclave cycles.
Safety Breakpoint Design: Select Gates Glidden drills engineered with a specific "weak point" at the top of the shank. This is a critical safety feature; if the drill binds in the canal, it is designed to break at the shank rather than at the tip, making retrieval from the canal orifice fast and simple.
Engine-Driven RPM Compatibility: Ensure your Gates Glidden drills are used within the recommended speed range of 800 to 1,200 RPM. Operating at the correct speed is vital for efficient debris removal and prevents the excessive heat generation that can lead to micro-fractures in the dentin.
Shank Length Variety: Opt for Gates Glidden drills available in different lengths (e.g., 28mm or 32mm). Shorter shanks are essential for posterior molars where inter-occlusal space is limited, while longer shanks provide the reach needed for maxillary canine preparations.