

GENERIC
Dental ALUMINIUM Impression TRAYS
In stock (513 units)Regular price LE 15.00 EGPUnit price /Unavailable-
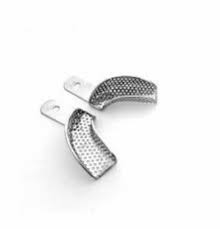
GENERIC
Dental ALUMINIUM Sectional TRAYS
Low stock (17 units)Regular price LE 10.00 EGPUnit price /Unavailable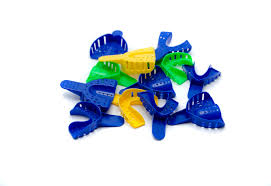
GENERIC
Impression Plastic Tray Medium size
Very low stock (1 unit)Regular price LE 20.00 EGPUnit price /Unavailable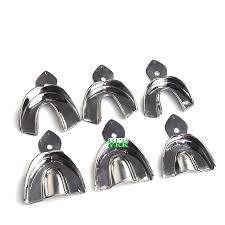
GENERIC
Impression Stainless steel Tray 6 pcs
Low stock (18 units)Regular price LE 575.00 EGPUnit price /Unavailable- Up to 29% off
Guard
In stock (100 units)Sale price LE 275.00 EGP Regular price LE 388.00Unit price /Unavailable -

Cotisen
Cotisen Bite Registration Tray Full Arch - 20 Pcs
Low stock (10 units)Regular price LE 225.00 EGPUnit price /Unavailable


A flexible or undersized tray distorts as the material sets and as it is withdrawn, introducing errors that are impossible to correct in the laboratory. MedSTA supplies impression trays for dental practices and laboratories across Egypt in autoclavable stainless steel and single-use disposable options, perforated and solid rim-lock designs, for both dentate and edentulous arches in a full range of sizes.
At MedSTA, you can pair your trays with the alginate, addition silicone, tray adhesive and impression accessories that complete the workflow — all from one Egyptian dental supplier, priced in EGP with fast nationwide delivery and reliable restocking.
How to Choose Dental Impression Trays
- Stainless Steel vs Disposable — Rigid stainless steel trays deliver the most accurate, distortion-free impressions and are autoclavable for repeated use, making them economical for routine restorative and prosthetic work.
- Perforated vs Non-Perforated (Rim-Lock) — Perforations let impression material lock mechanically through the tray for positive retention, which is ideal with alginate and many elastomers.
- Dentate vs Edentulous — Dentate (dentulous) trays are deeper to accommodate standing teeth, while edentulous trays are shallower and contoured to ridges for denture impressions.
- Stock vs Custom (Special) Trays — Pre-made stock trays are used for primary impressions and most fixed work; custom or special trays, fabricated for an individual patient, give the closest adaptation for final and edentulous impressions.
- Size Range (S/M/L, Upper/Lower) — Trays are graded by arch size — commonly small, medium and large for both maxillary and mandibular arches.
- Sterilisation & Reuse — If trays are reused, stainless steel that withstands 134°C steam autoclaving is essential for safe turnaround between patients.
- Specialty & Dual-Arch Trays — Beyond standard full-arch trays, dual-arch (triple) trays record the preparation, the opposing teeth and the bite in a single closed-mouth impression, which is efficient for single-unit crown and onlay work.
Impression Tray Selector
| Tray type | Material | Reusable? | Best for |
|---|---|---|---|
| Perforated stainless steel | Metal | Yes (autoclave) | Accurate alginate/elastomer impressions, routine use |
| Rim-lock (non-perforated) steel | Metal | Yes (autoclave) | Adhesive-retained materials, specific techniques |
| Disposable perforated | Plastic | No | High-volume, screening, infection-sensitive cases |
| Dentate (dentulous) | Metal / plastic | Varies | Arches with standing teeth |
| Edentulous | Metal / plastic | Varies | Denture impressions on ridges |
How to Select the Right Tray Size
- Assess arch width and length, and whether the arch is dentate or edentulous.
- Try the empty tray over the arch before loading material.
- Check for roughly 3–4 mm of clearance around the teeth or ridge for even material thickness.
- Confirm the tray covers the last teeth and tuberosities without impinging on soft tissue.
- Apply adhesive (non-perforated) or load directly (perforated), then seat and hold steady until set.
Availability & Delivery in Egypt
Every impression tray on this page is priced in EGP and shipped to clinics and laboratories nationwide. Autoclavable stainless steel sets are the economical choice for busy Egyptian practices that reuse trays daily, while disposable trays are convenient for high-volume screening and outreach — keep both formats stocked for flexibility.
Frequently Asked Questions
What is a dental impression tray?
What is a dental impression tray?
It is a tool that carries and supports impression material in the mouth, holding it against the teeth and soft tissues while it sets so an accurate mould of the arch can be produced for models, dentures or restorations.
What are the types of impression trays?
What are the types of impression trays?
Broadly, stock trays (pre-made, for primary impressions) and special or custom trays (made for an individual patient, for final impressions). Stock trays are available in stainless steel or plastic, perforated or rim-lock, and dentate or edentulous forms.
How do I select the right impression tray size?
How do I select the right impression tray size?
Choose a tray that covers the full arch with roughly 3–4 mm of clearance around the teeth or ridge for an even material thickness, without impinging on the soft tissues. Sizes are typically small, medium and large for each arch.
Are stainless steel impression trays reusable?
Are stainless steel impression trays reusable?
Yes. Stainless steel trays are designed to be cleaned and steam-autoclaved at 134°C between patients, which makes them economical for routine use when sterilisation protocols are followed and the trays are inspected for distortion.
Perforated or non-perforated — which should I choose?
Perforated or non-perforated — which should I choose?
Perforated trays retain material mechanically through the holes and are a versatile default, especially with alginate. Non-perforated rim-lock trays rely on adhesive and suit particular materials and techniques.
What is the difference between dentate and edentulous trays?
What is the difference between dentate and edentulous trays?
Dentate (dentulous) trays are deeper to fit arches with standing teeth, while edentulous trays are shallower and contoured for ridges. Using the matching form prevents tissue contact and distortion of the impression.
Do I need tray adhesive?
Do I need tray adhesive?
With non-perforated rim-lock trays, adhesive is important to retain the material during withdrawal. With perforated trays, adhesive is often still recommended with elastomers to prevent the material pulling away from the tray at the margins. Apply it in a thin, even coat and let it dry to a tack for the manufacturer-stated time — usually a minute or two — before loading the tray.